When you’re building an online course, one of the more annoying chores is converting video files and getting the file size down.
When you try to upload a video to an online course platform like Kajabi, you can run into problems like:
- The video file is too large
- The file format isn’t supported
- It’s a normal MP4, but for some reason it won’t upload properly
- Re-exporting from your video editor takes forever
Especially with hour-plus, two-hour-plus course videos, just re-encoding them in Premiere Pro or Final Cut Pro can eat up a huge amount of time.
So one trick I sometimes use to quickly convert and shrink a video is using YouTube as a video converter.
Instead of using dedicated video-conversion software, you can go:
Upload the original video to YouTube → let YouTube process it → download it back as an MP4
and end up with a file that’s relatively easy to work with.
Why can YouTube convert video for you?
Just because you upload a 5 GB video to YouTube doesn’t mean that 5 GB file is what actually gets delivered to viewers.
YouTube re-encodes every video you upload so it can play back smoothly across different devices and network conditions. YouTube itself explains that once you upload a video, it gets re-encoded into a format suited for playback.
For example, if you upload a 1080p video, YouTube processes it in stages, from lower quality up to higher quality.
That’s why you’ll often see only 360p available right after uploading, and then 720p or 1080p become selectable a little while later.
Higher-quality versions like 4K or 1080p take longer to process, and depending on the video’s length, resolution, frame rate, and format, that can take several hours.
This method takes advantage of that YouTube-side conversion process.
“It’s all MP4” doesn’t mean it’s all the same
Here’s where things get a little confusing: the .mp4 extension alone doesn’t tell you what’s actually inside the file.
MP4 is more like a “container” that holds the video — the actual video/audio codecs and encoding settings inside it can vary a lot from file to file.
So you can end up with situations like:
“The file is named .mp4, but it won’t upload.”
“It plays fine on my computer, but the course platform throws an error.”
Differences in bitrate and compression settings mean you can’t assume “it’s MP4, so it’ll definitely play” — that’s not always true.
Re-exporting from your video editor solves this, but doing that every single time is a real hassle.
Routing the file through YouTube gets it reprocessed on YouTube’s end, and you can then download it as an MP4 from YouTube Studio.
That often makes it easier to re-upload elsewhere than working with the original MOV (or whatever format) directly.
The advantage of using YouTube
The nice thing about this method is that you don’t need to install any dedicated video-conversion software.
It’s especially handy when:
“I don’t mind losing a bit of quality, I just want to shrink my course video’s file size.”
Because YouTube re-encodes the video, the resulting file can end up noticeably smaller than the original.
Also, when you export a video on your own machine, it uses your CPU/GPU — with this method, the heavy encoding work happens on YouTube’s servers instead.
That’s useful if your computer isn’t very powerful, or if you have several long videos to get through.
On top of that, YouTube Studio lets you select and upload up to 15 videos at once.
So you can batch-upload several course videos together and let YouTube churn through them one by one.
Steps to convert a video with YouTube
Here’s how to actually do it.
1. Open YouTube Studio
First, sign in to YouTube.
Any Google account you normally use for YouTube will work fine.
Once you’re signed in, open YouTube Studio.
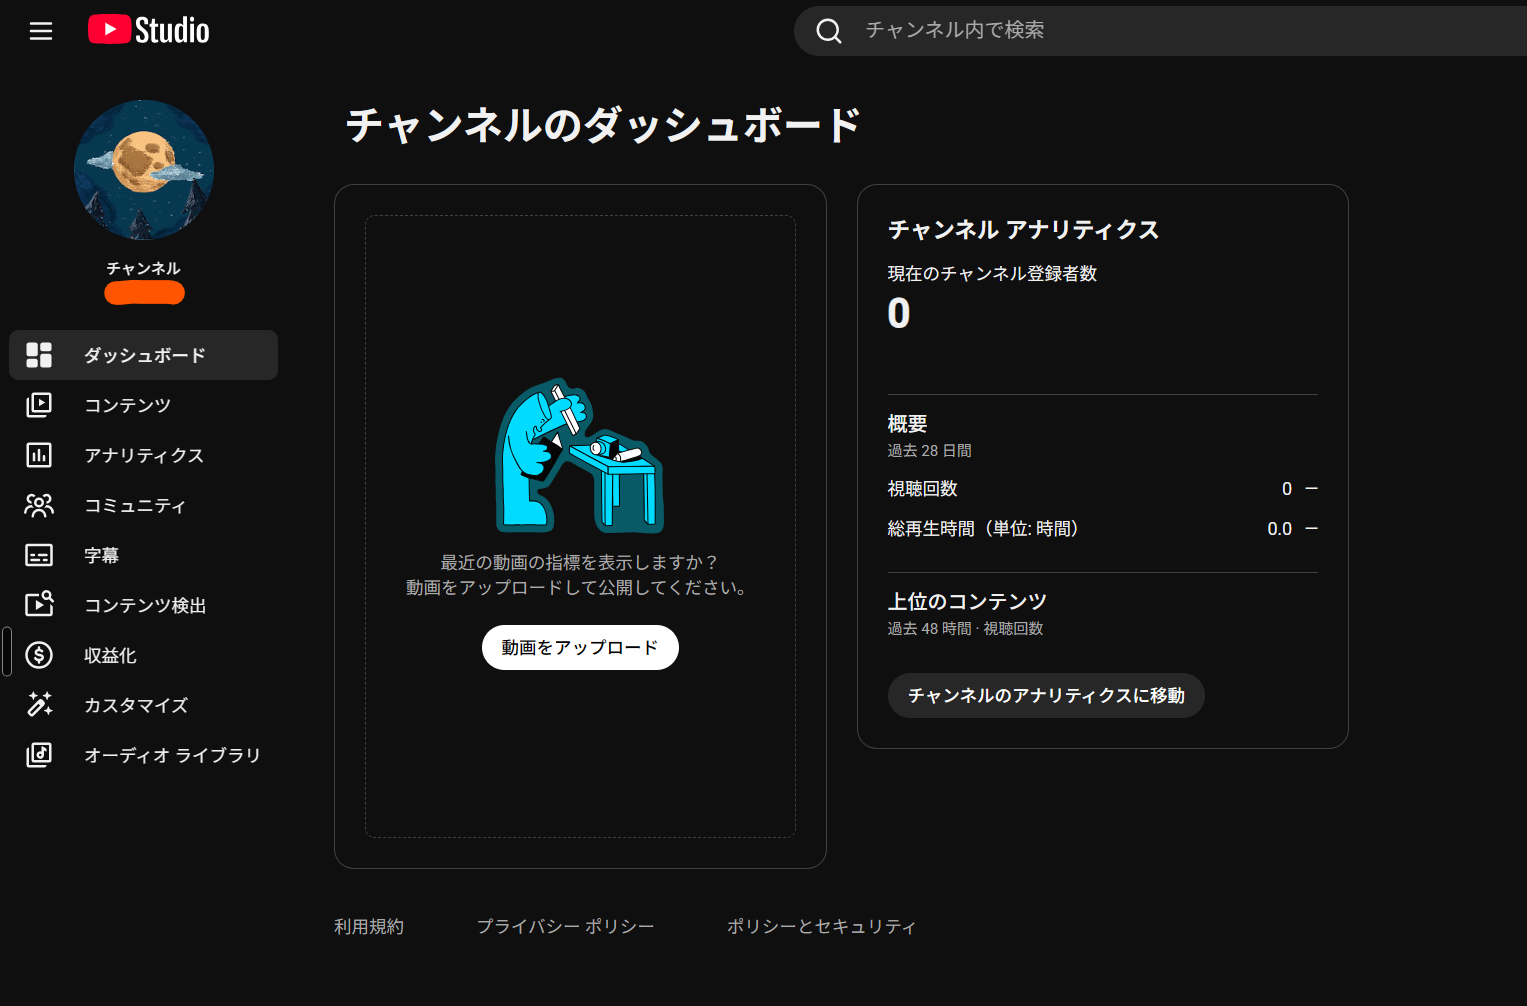
2. Upload the video
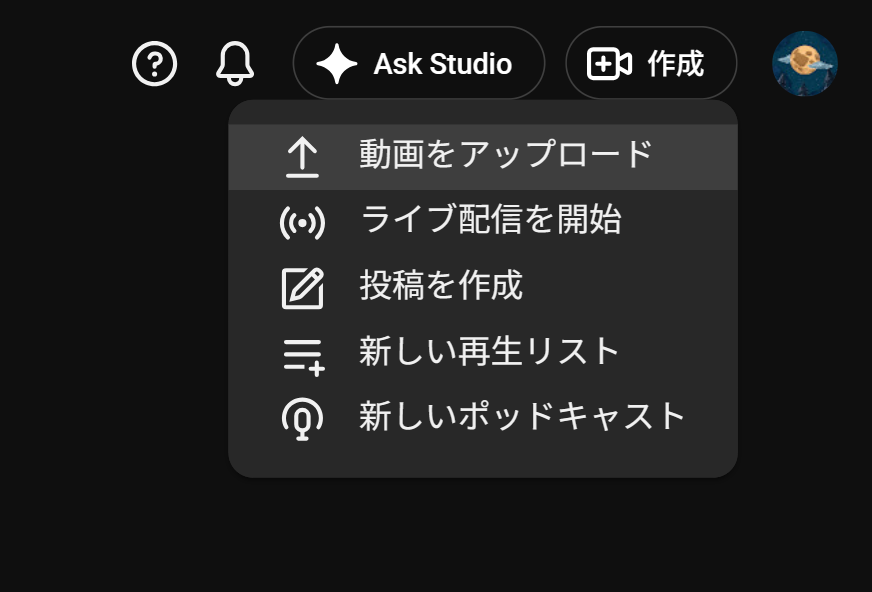
Click Create in the top right, then choose Upload videos.
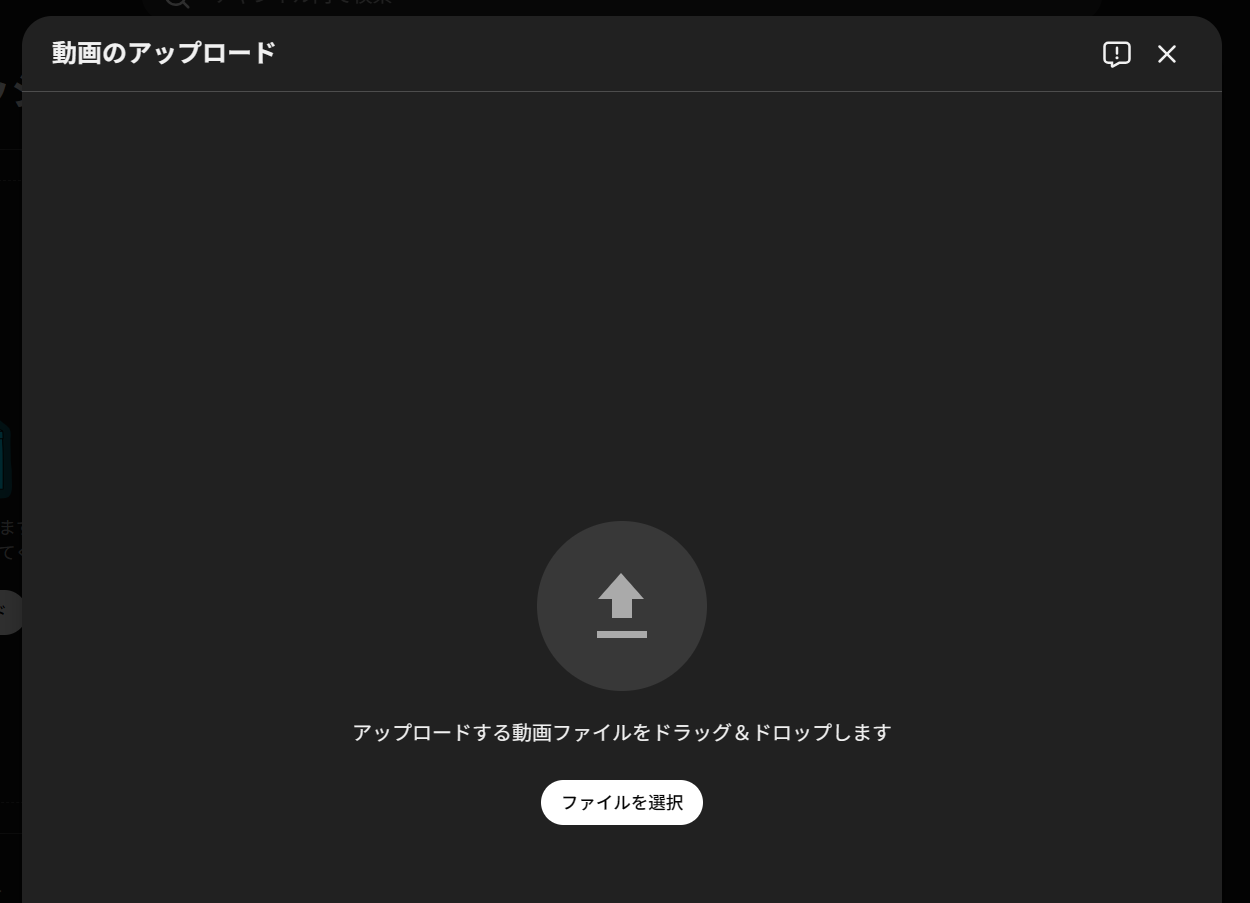
Select the video file you want to convert and upload it. You can click “Select files” to browse from your computer, or just drag and drop it in from a folder. You can process up to 15 videos at once.
Since the goal here isn’t to publish the video, I’d recommend setting the visibility to “Private.”
Private videos still get fully processed on YouTube’s end.
3. Wait for YouTube to finish processing
Once the upload finishes, don’t rush to download it right away — give it a little time.
YouTube processes the low-quality version first, then works its way up to HD and other higher-quality versions.
The easiest way to check whether processing is done is to actually play the video. Even for a private video, the admin can play it — click the YouTube icon in Content management.
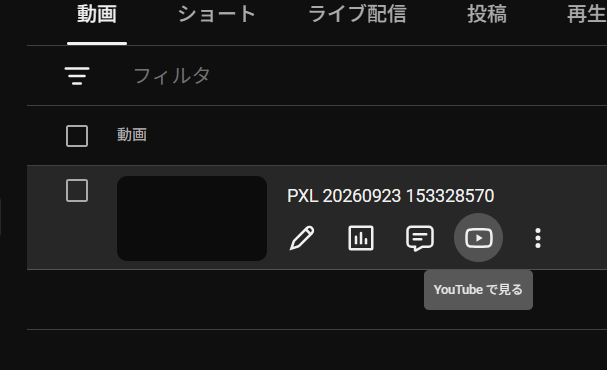
Check the gear icon → “Quality” setting in the bottom right of the video player.
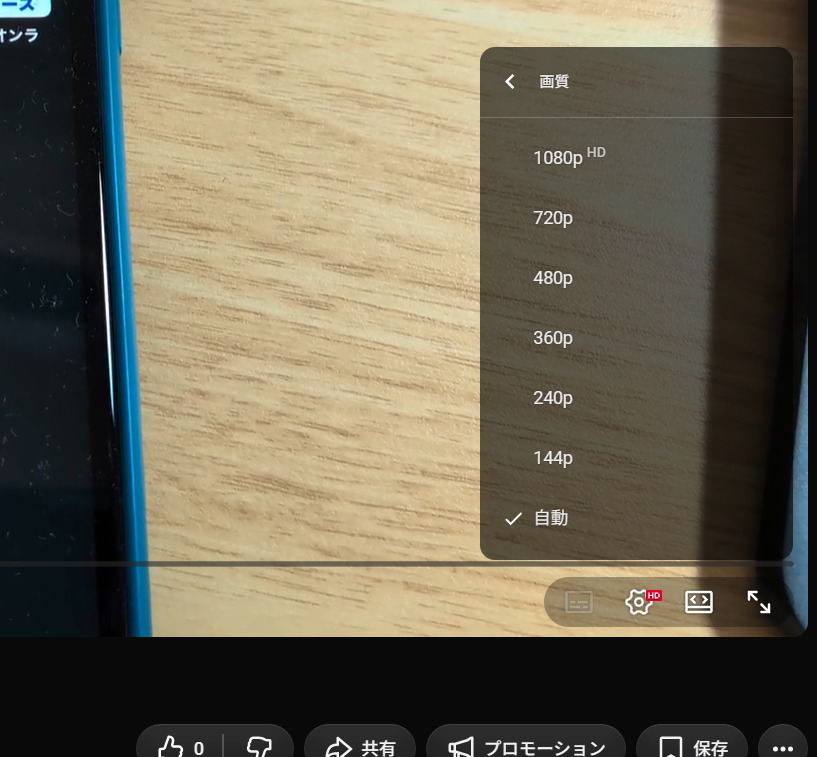
For example, if your original video is 1080p but only “360p” is showing up, the higher-quality version probably hasn’t finished processing yet.
Once a quality close to your original (like 1080p) becomes available, you can tell the higher-quality processing has caught up.
4. Download the video from YouTube Studio
Open Content in YouTube Studio.
From the menu on your video, choose:
“Download”
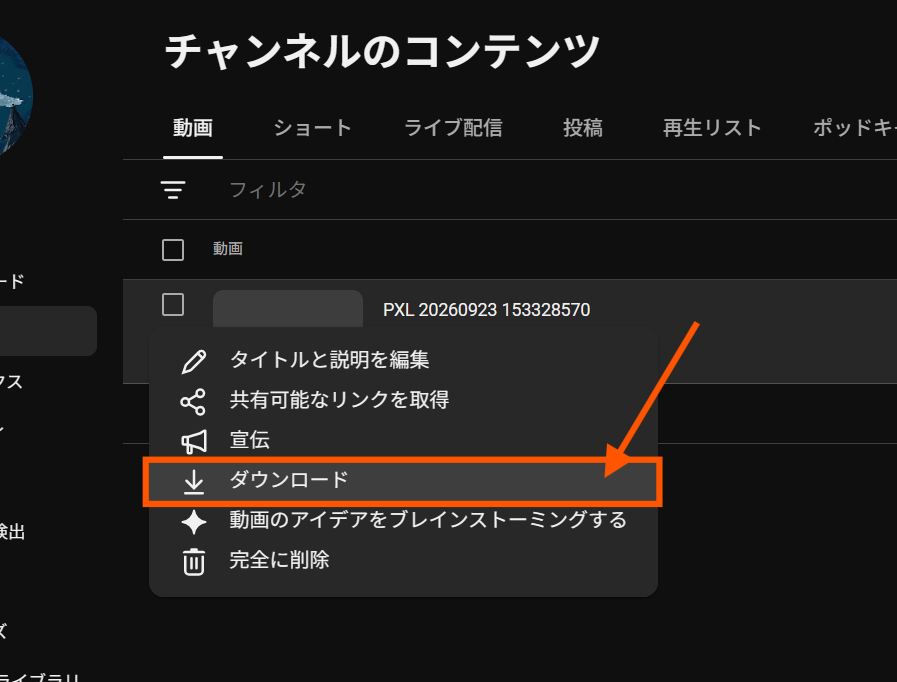
That gets you the YouTube-processed version of your video as an MP4 file.
Video formats YouTube supports
YouTube supports a pretty wide range of video formats.
According to YouTube’s official help documentation, the following formats are currently supported:
.MOV.MPEG-1.MPEG-2.MPEG4.MP4.MPG.AVI.WMV.MPEGPS.FLV3GPPWebMDNxHRProResCineFormHEVC (H.265)
That’s a very generous list of formats YouTube will accept.
You can upload a MOV, AVI, WebM, or any other format to YouTube and pull it back out as MP4 from YouTube Studio.
Watch out for audio-only files like M4A
If you use Zoom, you’ll sometimes end up with a separate .m4a file alongside your video.
M4A is an audio file, though, so you can’t upload it directly to YouTube as a video.
YouTube doesn’t have a built-in feature for turning an audio-only file into a video, so if all you have is audio, you’ll need to do something else first, like pairing it with a static image to turn it into a video.
Heads up: you can’t download 1080p or 4K from YouTube Studio
This is a point worth calling out specifically.
You absolutely can upload a video in 1080p or 4K to YouTube and watch it at that quality.
But according to YouTube’s official help documentation, when you download your own video from YouTube Studio, you currently only get an MP4 in “720p or 360p.”
In other words, this is not a conversion method where:
Upload in 4K → download in 4K
Upload in 1080p → download in 1080p
Even if you upload a high-quality video, the most you can download from YouTube is 720p.
So if maintaining 1080p or better really matters for a particular video, or for a course video where quality is non-negotiable, you’re better off encoding it yourself with FFmpeg or a video editor.
On the other hand, this method works fine for things like:
- Slide-heavy online courses
- Zoom webinar recordings
- Screen-share-focused teaching material
- Any video where you just want to shrink the file size a lot
For these, 720p is often good enough. Give this method a try, and if the quality loss ends up being too much for your taste, fall back to properly converting it with dedicated video software.
Think of this less as “a way to preserve high quality” and more as “a quick way to turn a video into a lighter MP4.”
Uploading videos over 15 minutes requires verification
By default, YouTube limits uploads to 15 minutes.
Once you verify your Google account, you can upload videos longer than 15 minutes.
It’s not unusual for online course videos to run 30 minutes or an hour or more, so if you’re planning to use this method, get your account verification done ahead of time.
As of now, YouTube’s upload limit is 256 GB or 12 hours, whichever is smaller. (That should be more than enough headroom for almost any use case.)
There’s also a daily limit on how many videos you can upload
YouTube caps how many videos you can upload per day.
That said, there isn’t one universal “X per day” number published for every account.
The limit varies depending on things like your account’s verification status, and accounts eligible for YouTube’s advanced features get a higher daily allowance.
So this method isn’t well suited to converting dozens or hundreds of videos in one go.
It’s realistic to use it for batches of a few to a dozen or so course videos at a time.
Be careful with videos containing copyrighted music or personal information
If you’re going to use this method, pay attention to what’s actually in the video you’re uploading.
Even if you set a video to “Private,” you’re still uploading the video data itself to YouTube.
In particular, videos that include:
- Commercial music or copyrighted background music
- Customers’ personal information visible on screen
- Confidential internal documents shown on screen
- Video a client entrusted to you
are all cases where, even for simple conversion purposes, it’s safer not to upload them to YouTube.
Also, if there’s a copyright or Community Guidelines issue with the video, you may end up unable to download it from YouTube Studio at all.
For sensitive video content, converting it locally with something like FFmpeg is a better fit.
When this method works well — and when it doesn’t
This method isn’t a silver bullet.
It’s especially good for:
“I just want an easy way to shrink a video down into a manageable MP4.”
For example, it’s handy when you’re cleaning up a Zoom seminar recording, or a multi-gigabyte course video, before uploading it to Kajabi. Recordings downloaded from Zoom in particular often come out in an awkward format, and I regularly hear about playback issues depending on the video player.
On the other hand, it’s not a good fit if:
- You need to keep 1080p or 4K
- You want fine control over bitrate or codec
- You’re working with video that contains customer information
In those cases, you’re better off using FFmpeg, HandBrake, Premiere Pro, Final Cut Pro, or similar tools.
Wrap-up: a handy trick for tidying up your online course videos
If you run online courses, “the video file is too big” or “the format doesn’t work” comes up more often than you’d think.
For serious, ongoing video management, using dedicated editing software or FFmpeg is still the reliable choice.
That said, the flow of:
Upload the video to YouTube as Private
↓
Let YouTube convert and compress it
↓
Download it back as MP4
is genuinely useful for quick, casual video conversions.
It’s worth keeping in your back pocket, especially for online course videos where file size and convenience matter more than raw image quality.
I sometimes use it myself in situations where re-exporting from a video editor just isn’t worth the effort.
If you’re struggling with file format or size issues when uploading video to Kajabi or similar platforms, give this a try.
